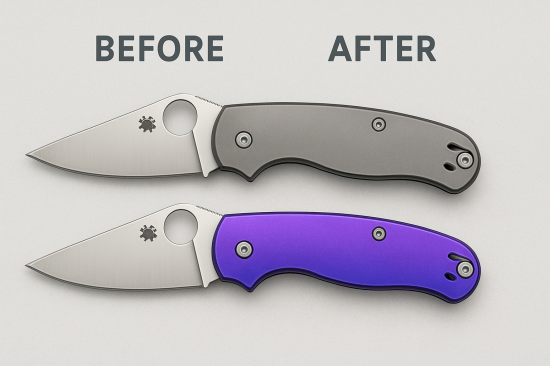
Anodizing Your Spyderco: How to Customize Without Damaging the Finish

By Logan M. Fraser – Custom Knife Modder & Spyderco Parts Specialist, Based in Calgary, Alberta, Canada
This is the 24th blog of the Spyderco Knife blog series. You can check the other blogs I’ve written here: https://spydercoparts.com/blogs
If you’re thinking about anodizing your Spyderco, you’re not alone. Anodizing is one of the most popular ways to personalize titanium parts, and it’s a mod I do often in my workshop. But if done wrong, it can ruin your hardware—or worse, affect lock geometry.
In this guide, I’ll walk you through how to anodize safely, which parts are ideal, and what to avoid if you want to protect the structure and integrity of your Spyderco.
What Is Anodizing, and Why Do It? 🎨
Anodizing is an electrochemical process that changes the oxide layer on titanium or aluminum, resulting in color shifts without the use of dyes or paint.
Benefits:
Totally custom look (from gold to teal to electric purple)
Adds a bit of corrosion resistance
Doesn’t peel like coatings or Cerakote
🔎 Learn more about the science at https://en.wikipedia.org/wiki/Anodizing—great for understanding voltage-to-color mapping.
What Spyderco Parts Can You Anodize? 🛠️
Ideal Candidates:
Titanium pocket clips
Backspacers
Standoffs
Full titanium scales (e.g., on Spyderco SpydieChef, McBee, or Drunken)
DO NOT Anodize:
Blade steel — it’s not titanium, and anodizing won’t take
Lock faces — this can cause lock stick or slip
Pivot bearing races — you’ll ruin tolerances
💡 If you’re unsure if a part is titanium, try a magnet test—titanium is non-magnetic.
Tools and Supplies You’ll Need 🔌
9V batteries or variable power supply
Alligator clips and wires
Anodizing container (plastic)
Distilled water + baking soda (electrolyte bath)
Safety gear: gloves and eye protection
🧱 Pro tip: For better color control, use a regulated power supply rather than stacked batteries. Voltage = color.
Step-by-Step Anodizing Guide ⚡
1. Clean the Part Thoroughly
Use degreaser or acetone to remove oils
Rinse in distilled water
2. Set Up Your Circuit
Negative lead goes to your cathode (usually stainless steel)
Positive lead connects to the titanium part
3. Dip Into Electrolyte Solution
Mix ~1 tbsp baking soda per cup of water
Submerge part and activate voltage
4. Control Your Voltage
15V = gold
18V = purple
25V = blue
30V = teal
40V = bronze
Leave it in for a few seconds—color develops fast. Rinse immediately after.
5. Seal and Reinstall
Optional: light buff or polish
Let fully dry before reinstalling
Mistakes to Avoid ❌
Using tap water (impurities affect finish)
Touching anodized parts with bare hands (oil disrupts color)
Anodizing parts still assembled to the knife (electrical paths can arc unpredictably)
My Shop Workflow 🧑🏭
When anodizing customer knives, I always:
Fully disassemble the part from the knife
Test color match with scrap titanium first
Buff lightly and clean with isopropyl after
And if a client wants a part that’s hard to anodize cleanly (like internal liners), I recommend a stonewashed titanium replacement instead.
You can find pre-anodized clips, standoffs, and hardware kits at https://spydercoparts.com—we test every part for function and finish.
Helpful Resources 📚
https://spyderco.com: For knife model specs and part composition
https://forum.spyderco.com: Community tips on anodizing results and voltage control
Use these to confirm which models have titanium parts before attempting a mod.
Final Thoughts 🔪
Anodizing your Spyderco is a great way to express your style—if you do it right. Always verify the material, isolate the part, and control your voltage to get the cleanest results.
Have questions about anodizing Spyderco parts or which models are best for modding? Drop them in the comments below—and let me know what you’d like to see covered in next week’s Spyderco Knife Blog Series.

